Whether you're a seasoned tradesman, a design-savvy architect or a DIY enthusiast planning your first home update, one thing remains key — preparation. To achieve that perfect, professional-looking finish, prepping your walls properly before painting is essential. Rushing into applying paint without the right groundwork can lead to uneven coverage, visible flaws, and a wasted investment in both time and materials. In the UK, where many homes feature aged plaster, textured surfaces or walls exposed to moisture, taking the right prep steps is not just advisable — it's necessary.
In this guide, we break down the entire process of wall prep, step-by-step. From assessing wall conditions and repairing imperfections to cleaning and priming, we'll ensure your walls are ready to accept paint and help you achieve durable, high-quality results.
1. Assess the Wall Surface
Before you break out the brushes or rollers, take a close look at the current state of your walls. The type of prep they require depends largely on their existing condition and what their surface has been exposed to over time.
If you're dealing with freshly plastered walls, you'll have different requirements compared to walls coated in layers of old paint or wallpaper. Check for damp, staining, mould, or peeling paint. These are all signs of underlying issues that must be addressed before painting. In many UK homes, particularly older Victorian or Georgian properties, you may find previous coats of oil-based paints or textured wall coverings, which require special treatment.
Use a bright light or torch held up to the wall to help highlight imperfections such as dents, hairline cracks, or previous filler work. Identify any areas that feel soft (indicative of water damage), chalky surfaces, or telltale signs of mould growth. Don’t forget to inspect around skirting boards, windowsills and corners where cracks and imperfections are more likely to appear.
2. Remove Old Paint and Wallpaper
If your walls have existing paint that is flaking or bubbling, it needs to come off. Use a paint scraper or putty knife to remove all areas of loose or peeling paint. For stubborn patches, especially with gloss or oil-based finishes, consider using a chemical paint stripper — ensure it’s suitable for interior use and always follow the manufacturer guidelines. Mechanical sanding with an orbital sander or sanding block can help smooth down edges where old paint meets bare wall.
Wallpaper removal can be more time-consuming. Start by scoring the wallpaper surface with a utility knife or wallpaper scorer, then use a steamer or a wallpaper remover solution mixed with warm water to loosen the adhesive. Scrape gently to avoid damaging the plaster underneath. Use caution in older homes, as some may have more delicate plasterwork that may crumble under too much pressure.
3. Fill Cracks and Holes
Once the wall is bare, it’s time to address cracks, nail holes, and other imperfections. High-quality filler is crucial for both large patches and hairline cracks. For deep holes or large damage, you may need to apply filler in layers, allowing each layer to dry before applying the next. Use a wide putty knife for application and feather out the edges to blend in with the wall.
In properties across the UK, especially those with brick or block walls, you might also need to fix minor movement cracks — common in both older homes and new builds. For dynamic movement areas, use a flexible filler or caulk designed for walls and ceilings, particularly around coving or between ceiling-to-wall lines.
Once dry, sand the filled areas until smooth and level with the surrounding wall. Use a medium-grit sandpaper for initial smoothing, followed by a fine-grit paper or sanding sponge for a flawless finish. Always wear a dust mask when sanding to protect from particles.
4. Clean Your Walls Properly
After sanding and filling, dust and residue must be removed completely. Painting over dust will compromise paint adhesion and create texture that ruins your finish. Use a vacuum cleaner with a soft brush attachment to remove the heaviest dust, paying attention to corners and around woodwork.
Next, wash the walls using sugar soap — a commonly used cleaner across the UK for prepping painted surfaces. It effectively removes grease, smoke stains and general grime that builds up, especially in kitchens, hallways or high-traffic areas. Mix the sugar soap according to the instructions and use a sponge to gently wash down the wall. Rinse with clean water and allow to dry fully.
For areas with mould or mildew, particularly common in UK bathrooms or poorly ventilated flats, use a mould-killing cleaner before sanding or priming. Simply painting over mildew will cause it to reappear and potentially affect paint adhesion.
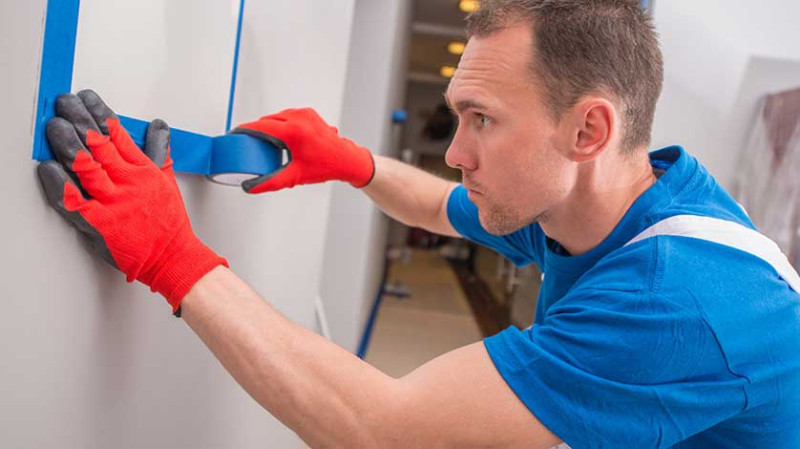
5. Masking and Protecting Surrounding Areas
Wall prep isn’t just about the wall itself — it also involves protecting adjacent surfaces. Use high-quality painter's tape to mask off skirting boards, architrave, sockets, switches, window frames, and other trim. Don’t forget to remove or loosen any faceplates or fixtures for a cleaner result.
Lay down dust sheets or plastic sheeting on the floor and tape them securely in place. Use heavy-duty canvas drop cloths for large rooms or staircases, as they’re non-slip and reusable — ideal for tradesmen and decorators covering larger projects.
This step may seem minor, but taking your time with masking prevents time-consuming touch-ups and keeps things looking tidy and professional — especially important when colour-blocking or using multiple paint shades.
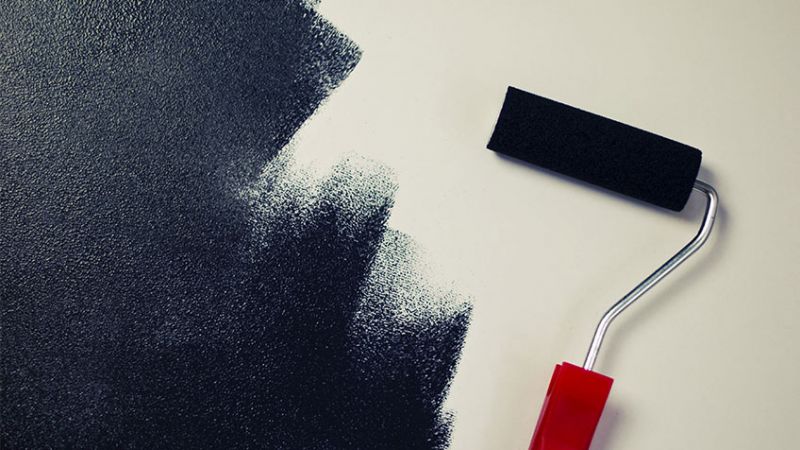
6. Apply Primer Where Necessary
Priming is often skipped, but it plays a vital role in achieving even colour coverage and long-lasting results. If you’ve repaired large sections, sanded extensively, or are painting over a strong colour, priming is essential. It helps ensure better paint adhesion, reduces blistering, and can block stains and discolouration.
In the UK market, you’ll find a variety of primers tailored for different surfaces — including masonry primer for external brickwork, stain-blocking primers for water-damaged walls, and multi-surface primers suitable for new plaster, bare wood or previously painted substrates.
For freshly plastered walls, a mist coat is often recommended. This is simply a diluted coat of emulsion paint (typically mixed 70% paint to 30% water) that soaks into the porous surface of plaster, sealing it before applying full coats of regular emulsion or topcoat.
Once applied, allow the primer or mist coat to dry completely before applying your main paint colour. Always follow drying times specified on the primer label, as rushing this stage can impact the paint's final finish.
7. Final Surface Check
With priming complete and every surface clean, it’s time to give the walls one final check. Run your hand over the surface — it should feel smooth and consistent. Use your eyes and even a torch to identify any shiny filler spots, missed sanding areas, or residual marks that may show through the paint.
If there are minor rough patches, now’s the time to give them a light sand. Touch up with filler if needed and allow to dry, followed by spot priming. It’s always quicker and more cost-effective to catch these issues before applying your final coats of expensive quality paint.
Conclusion: The Secret to a Perfect Paint Job Lies in the Prep
No matter if you’re refreshing a single feature wall in a rented flat or undertaking a full renovation of a listed UK townhouse, wall preparation is the foundation for success. It’s the difference between a paint job that looks ‘DIY’ and one that appears professionally done.
In summary, the essential wall prep steps — analysing surface condition, removing old finishes, filling damage, thoroughly cleaning, protecting surrounding areas and applying the right primer — are universal across painting projects, and mastering them will elevate all your future decorating work.
Take the time to do it right, and your colour choice will pop, your finish will last, and your space will feel renewed and professionally polished. Now you’re ready — paint brushes at the ready — for the fun part to begin. Happy decorating!

Trending articles
-
How To Prep Your Walls Before Painting ...
24 Apr, 2025
-
 The Top Advantages of Exterior ...
16 Jul, 2020
The Top Advantages of Exterior ...
16 Jul, 2020