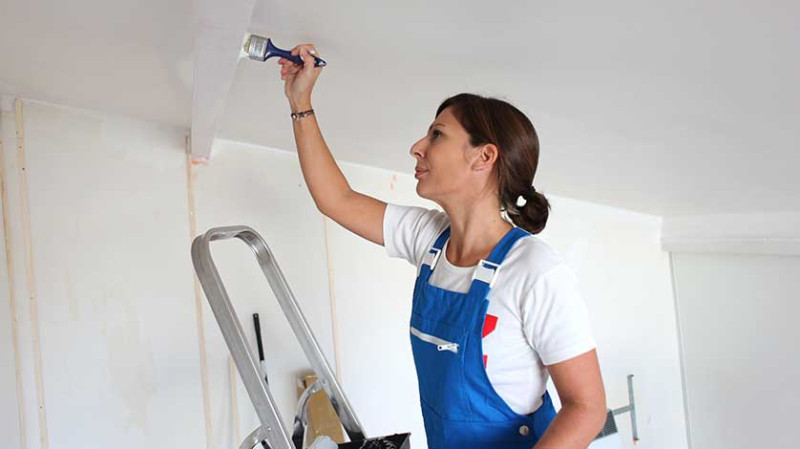
If you're painting a room, cutting in around the ceiling is one of those tasks that can feel intimidating at first. But with the right techniques and tools, you can achieve clean, professional-looking lines—even without using masking tape. Whether you are a seasoned tradesperson, an interior designer, or a DIY enthusiast revamping your first flat, mastering this skill will significantly enhance the final finish of your painting jobs.
This blog walks you through pro tips to get crisp, straight lines where the wall meets the ceiling. Cutting in doesn’t have to be stressful or messy. With these tips and strategies, your home will look like it was finished by a seasoned decorator from the heart of London itself.
What Does “Cutting In” Mean?
Before diving into techniques, let’s clarify the concept of “cutting in.” In painting terms, cutting in refers to using a brush to paint the edges where a roller cannot reach—essentially along ceilings, corners, and trim.
This approach provides a neat boundary without overlapping paint where it doesn’t belong. It's particularly important when dealing with contrasting colours on walls and ceilings, common in modern interiors across UK homes from Manchester to Brighton.
Often, cutting in is done freehand using a brush, but it can also involve tools like edging pads or paint shields. While taping off edges is an option, know that professional decorators rarely rely on masking tape to achieve smooth lines.
Choose the Right Tools for the Job
Your tools matter. Using the wrong brush or ladder can turn a 45-minute job into a several-hour disaster. Here’s what you should arm yourself with:
- Angled sash brush (2”–2.5”): The angled bristles allow precision and flow well along straight lines.
- Extension pole and step ladder: If you’re working in a room with high ceilings, don’t risk your safety. Use a high-quality ladder and consider an extension pole for corners.
- High-quality paint: Cheap paint often lacks pigmentation, which can result in streaks and increased effort when cutting in.
- Painter’s cloths: Draping cloth under your workspace protects floors from unexpected drips and flicks.
Opting for professional-grade tools will save you time and allow for greater efficiency. In particular, British brand Purdy or Hamilton offer excellent angled brushes perfect for painters at all levels, from trade decorators in Birmingham to DIYers in York.
Prepare Thoroughly Before Your First Stroke
Don’t rush. Preparation is 80% of the job when it comes to painting. Just like prepping for a successful presentation or project, a flawless finish starts with setup.
Before painting, dust and clean the ceiling edges and corners where you’ll be cutting in. Any cobwebs or accumulated dirt will not only interfere with paint adhesion but may also cause unsightly bumps in your final finish.
Ensure your paint is well-stirred, and pour a manageable amount into a handheld paint pot or cutting-in tray. You’ll avoid overloading the brush and reduce the risk of spills as you move up and down the ladder.
Also, good lighting is key, especially in older UK properties where natural light may be limited. Use a portable LED light or wear a hands-free headlamp to illuminate your ceiling lines clearly and avoid overlapping onto the ceiling.
Use the "Feathering" Technique
One of the best-kept secrets among professional painters is the feathering technique. This involves applying the paint with heavier pressure at the edge and tapering out the rest of the stroke to blend seamlessly into roller-painted areas.
Dip your brush about one-third of the way into the paint—never submerge the full head. Then, tap it on the side of the tray to remove excess paint. Starting about half an inch away from the edge, push the bristles gently up toward the ceiling, letting the angled brush help you form a fine line.
Make small, overlapping strokes and return with light passes to even out the coverage. This reduces hard lines and makes it easier for you to roll the main wall surface without leaving brush marks or inconsistencies.
Once you get the hang of it, you’ll find this technique not only efficient but also quite satisfying to execute. Like a good cup of tea, it’s all in the finesse.
Work in Sections & Maintain a Wet Edge
When cutting in, always work in sections no wider than 1.5 to 2 metres. This helps to maintain a “wet edge,” which is vital when it’s time to roll the rest of the wall.
In the UK’s often humid climate, paint drying times can vary significantly. In warmer months or with quick-drying paints, your brushwork might dry too quickly, leaving a permanent edge if not rolled over promptly. To avoid this, paint one section of the edge and immediately use a roller to finish the adjacent area.
This approach is especially important in open-plan designs popular across new-build flats and redevelopments throughout urban areas of the UK, where light and visibility often reflect imperfections.
Don’t Skip The Second Coat
It might be tempting to complete one round of cutting in, roll the wall, and call it a day. But even top-quality paints generally require two coats for a uniform, durable finish—especially at edges.
Apply your second coat of cutting in after the first has fully dried. This not only intensifies colour but ensures that any missed areas or translucent streaks are covered.
Cutting in twice might feel tedious, but straying from this step compromises the final aesthetic. Think of it as ironing your best shirt twice—grouping effort with pride in presentation.
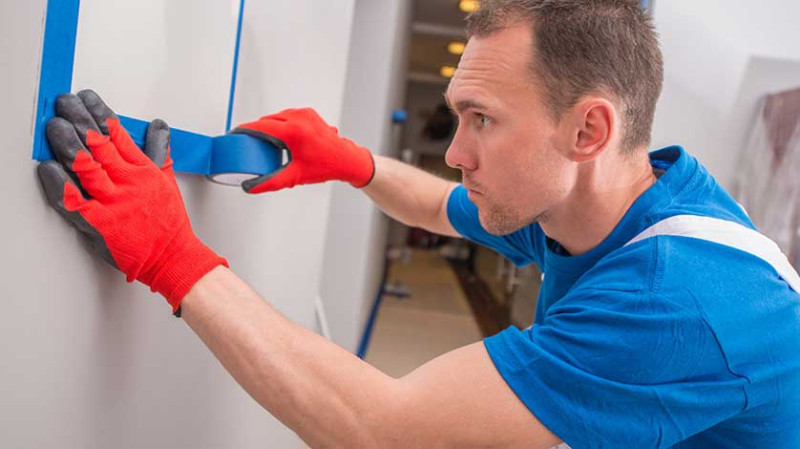
Protecting From Mistakes: When To Use Tape or Shields
Although most professionals steer away from painter’s tape when cutting in ceilings, there are scenarios where it can be a wise addition—particularly for beginners or when working against high-contrast colours.
Low-tack masking tape or a paint shield can be useful when painting tricky spaces with ornate ceiling features or textured surfaces common in Victorian-era London homes.
Be cautious when applying tape to freshly painted walls or ceilings; allow surfaces to cure fully (typically 24–48 hours) or use specialist low-tack options designed to prevent paint lift.
Try a Cutting-In Pad or Edge Tool
For DIYers nervous about using brushes, cutting-in tools like pad edgers or trim guides might offer a more confident solution. These tools feature rollers or pads with built-in guards to help deliver straight lines without freehand precision.
While not always suitable for uneven walls or corners, these tools can be a great help when working in modern homes with clean lines and gypsum-based plasterwork.
Look out for UK-available tools from brands like Harris and Wagner, which have local availability in B&Q, Screwfix, and online retailers like Toolstation or Wickes.
A Quick Comparison of Cutting-In Tools
| Tool | Best For | Pros | Cons |
|---|---|---|---|
| Angled Brush | All layouts, professional finishes | High control, reusable, excellent for corners | Requires steady hand and practice |
| Edging Pad | Flat ceilings and straight edges | Quick to use, ideal for DIYers | Less effective on textured or uneven surfaces |
| Paint Shield | Protecting adjacent surfaces | No taping required, reusable | Needs regular cleaning mid-use, tricky in corners |
| Painter's Tape | High-contrast edges, beginners | Confidence for straight lines | Requires correct removal timing, risk of bleed-through |
Final Thoughts: Practice Is Your Best Tool
The first few times you cut in a ceiling, it might feel like more art than science. But the more you practise, the more natural it becomes. Try cutting in in subtle, less-visible rooms like utility spaces or spare bedrooms to build your confidence.
Even if a few brush marks happen early on, remember: it’s better than over-rolling up onto the ceiling and having to repaint it entirely. With time, your ceiling lines will rival those of even the top decorators working in high-spec Chelsea lofts.
So pick up that brush with a steady hand and sharp eye—and transform your home one edge at a time.

Trending articles
-
Pro Tips to Cut in Ceiling Paint ...
29 Apr, 2025
-
 How To Prep Your Walls Before Painting ...
24 Apr, 2025
How To Prep Your Walls Before Painting ...
24 Apr, 2025
-
 The Top Advantages of Exterior ...
16 Jul, 2020
The Top Advantages of Exterior ...
16 Jul, 2020